 |
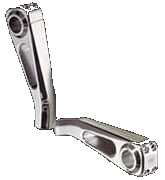
Planet Cruiser 6 inch risers (AU159) |
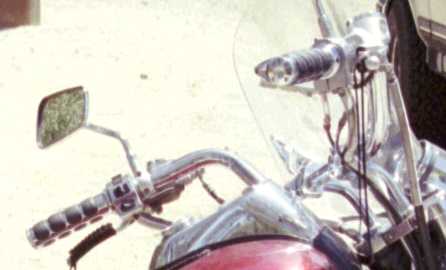 In the search for more comfort on a long ride, I originally installed a
set of 5x2 risers and a set of Custom Chrome 1 inch Dresser bars. (
pictured right-> )The combination worked very well, giving me the pull
back I was looking for with the risers and the change in angle on the
wrist for the bars. (The original bars were a buck horn style). This
also worked well with the Kawasaki Fire and Steel V-Force windshield I
had on that time. I was also able to use the stock cables with this set
up by simply changing how they were routed.
In the search for more comfort on a long ride, I originally installed a
set of 5x2 risers and a set of Custom Chrome 1 inch Dresser bars. (
pictured right-> )The combination worked very well, giving me the pull
back I was looking for with the risers and the change in angle on the
wrist for the bars. (The original bars were a buck horn style). This
also worked well with the Kawasaki Fire and Steel V-Force windshield I
had on that time. I was also able to use the stock cables with this set
up by simply changing how they were routed.When I installed the Windvest windshield,I had a problem with the windvest mounting brackets hitting the gas tank nacelle and putting small dents in it, as well preventing me from turning the bars to full stops. So I needed to change my risers.
Since I had in the mean time also replaced the handlebars with the 1 1/4 inch "Chubby" version, I was even more limited in what risers I could use. The risers set at the very edge of the indented recess where the risers clamped on the bars. A number of the ones I looked at were just too wide at the top to work. The would overlap on the 1 1/4 inch section of the bar and not tighten up properly.
The Planet Cruiser risers solved the clearance problems easily, but they have a small flange on each side sticking out about 1/4 inch. Which was exactly the amount of space I needed to make them fit.
NOTE: If you have the standard 1 inch diameter bars OR are using these on a bike with the more standard 3 1/2 inch on center riser spacing they should work just fine. The following is ONLY for making them work on a the 1 1/4 inch bars with a 3 15/16th on center spacing.
To make these work, that flange needs to go. Now since these are just polished aluminum, not chromed, these if a fairly simple thing to do. All you need is a belt sander and a willingness to do some major surgery to your nice shiny new risers.
Here you can see the step down in the bar, note the difference in the flange
on each side of the riser after modification.
- If you are using a standard hand held belt sander, clamp it into a vice with the sandpaper facing up.
- Have a cup of water handy to dip the riser in to keep it cool as you work on it. It will get HOT
- Make sure the top clamps are secured tightly to the riser.
- Use a grease pencil and mark the side of each riser that is going to be facing out. This is very important because you don't want to do the wrong side.
- Turn on the sander and slowly sand off the flange on the side you have marked. You want to sand it down till there is approximately 1/16th of an inch of it left.
- Repeate on the opposite side of the other riser.
- Place a soft towel over the tank to protect it
- Remove top clamp of current risers
- Remove bars carefully
- Unbolt the risers from the top tripple clamp and remove old risers
- Find a drill bit to match the size of the bolts that come with the new risers and drill out the mounting holes to fit
- Bolt the newly modiifed risers in place
- Remove top clamps of new risers
- Install bars
- You may need to reroute your contole cables at this point
- Adjust bars to fit your reach and tighten the top clamps
Go for a ride!
Front View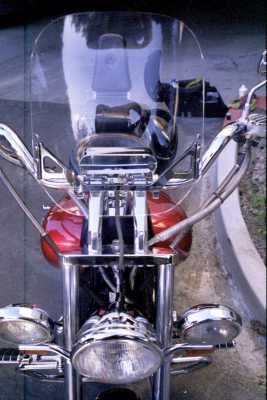
|
Side View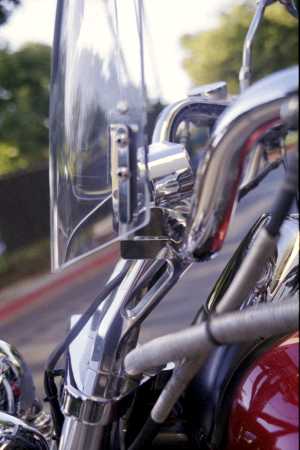
|